How to configure WP Mail SMTP to send with Amazon SES
As you setup your WordPress site, be it on AWS Lightsail as I explained in an earlier post, or with any host, one of the first plugins you may wish to add WP Mail SMTP. WP Mail SMTP is the leading mail plugin for WordPress, and it comes with a free tier.
Email delivery for your website is a critical component. And from my experience, trying to manage your own SMTP server can be very difficult, due to the constant security breach attempts and DDOS attacks you will receive, as soon as hackers and bots sniff the fact that you’re running an SMTP server! They know, you’re not going to be as elaborate and well funded as the big guys, and they will eventually get through to your server and start abusing it.
Having said that, one of the most straightforward and most reliable providers for email services, is non-other than AWS, with their Amazon Simple Email Services (SES).
In this article, I will explain how to setup your Amazon SES account, and how to configure the WP Mail SMTP plugin to send through it, even with the free tier of the plugin.
Setting up Amazon SES
I’m going to start here by assuming you already have an AWS account that has sufficient privileges. Once you log in to your AWS account, you need to head over to the Amazon SES page.

The first step here is to create and verify a sender identity. Typically this would be your domain name, but practically you can also start with the email address you want to be sending your emails from.
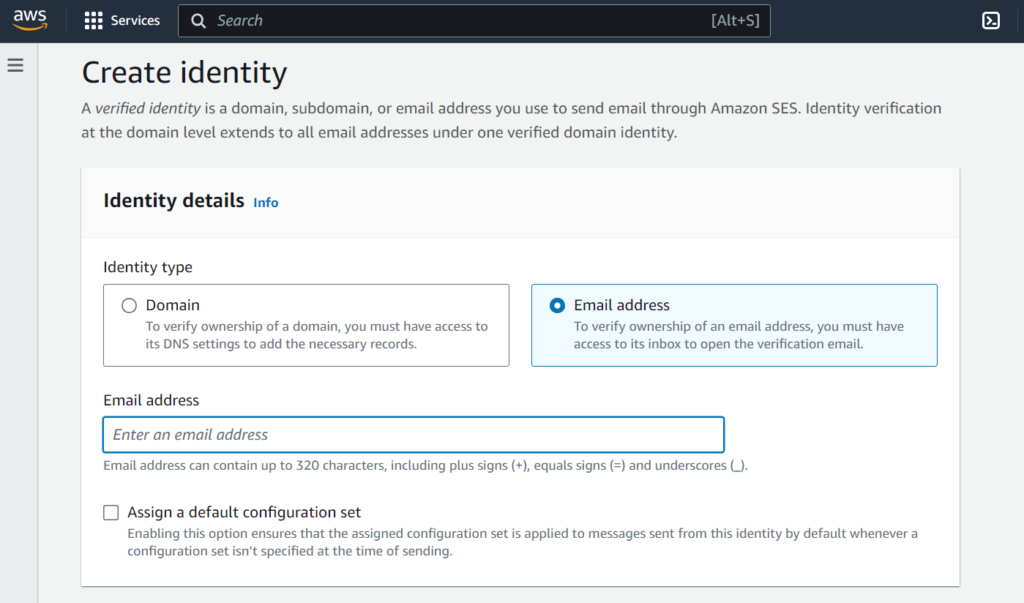
All you need here is to provide the email address you want to be sending from. You certainly need to have access to this email address, as to verify it, AWS will send you a verification link that you need to click, to enable this email address.
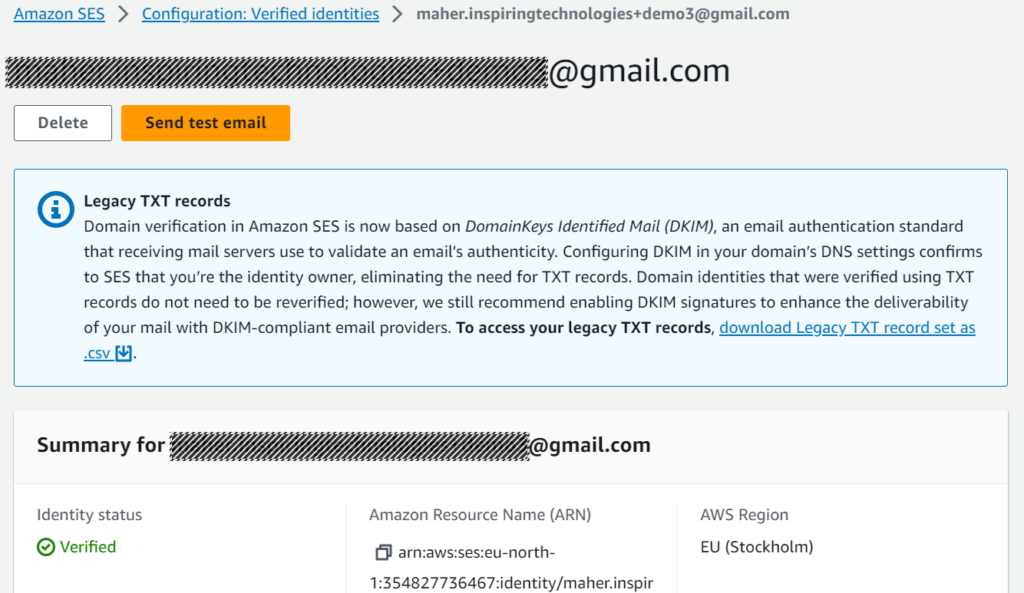
When you receive the verification email from AWS, you need to click the link. By clicking the link, you will verify and enable the email address to be used for sending from. Once verified, you will see a screen similar to this:
Not Done Yet!
Verifying your first email address will not allow you to send emails yet. Amazon SES at first, is launched in a “Sandboxed” configuration. So both the sender email address and recipient email address need to be verified. Alternatively, you can verify your whole domain, and all email addresses within it will also be verified. But for our exercise here, let’s verify a second email address; the recipient.
When you’re ready to go into production mode, of course, you will not have to verify every email address!
Having verified two emails now, we can proceed to the next step: Creating SMTP Credentials.
Creating SMTP Credentials
In order to access the SMTP interface of Amazon SES, you need to have SMTP Credentials. Creating these essentials is very easy. You’ll need to start from the SMTP Settings page, as shown here:
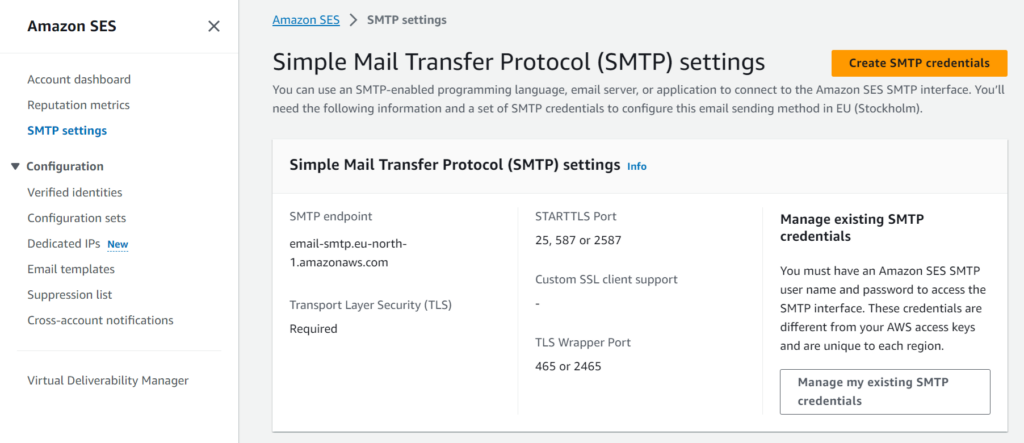
Click the “Create SMTP credentials” button. You can proceed with the username AWS suggests. But make sure to save these credentials securely.
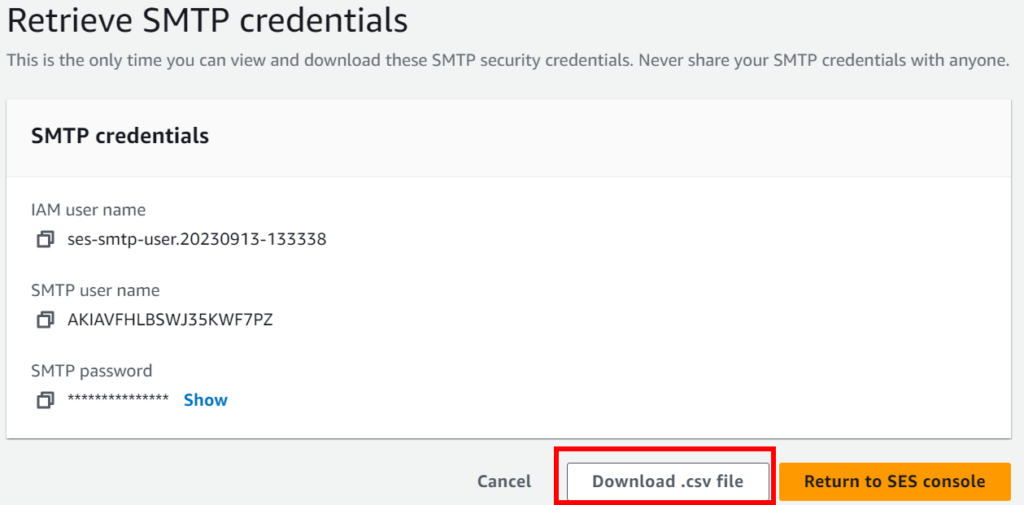
I highly recommend you download the .csv file, but make sure this file remains as secure as possible (by limiting access to it.)
Now you’re ready to start working on the WP Mail SMTP plugin.
Installing and Configuring WP Mail SMTP Plugin
The plugin we’re using for this integration is WP Mail SMTP by WPForms. You can simply install it by adding a new plugin, from your admin dashboard.
After installing this plugin, you need to activate it. As you activate it for the first time, it will take you to the setup wizard. Here, you need to select “Other SMTP” as you mailer, as shown here.
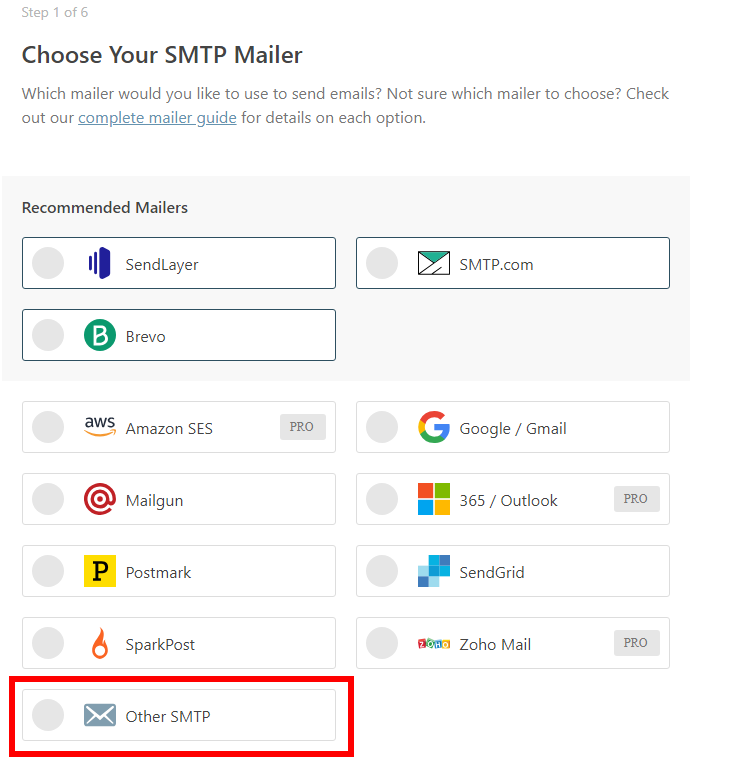
In the following screen, you will need to supply these pieces of information at a minimum:
- SMTP Host
- SMTP Username
- SMTP Password
- From Name
- From Email
Note that WP Mail SMTP automatically provides the correct port for SMTP connection, for Amazon SES, you’ll be using TLS on port 587.
SMTP Host
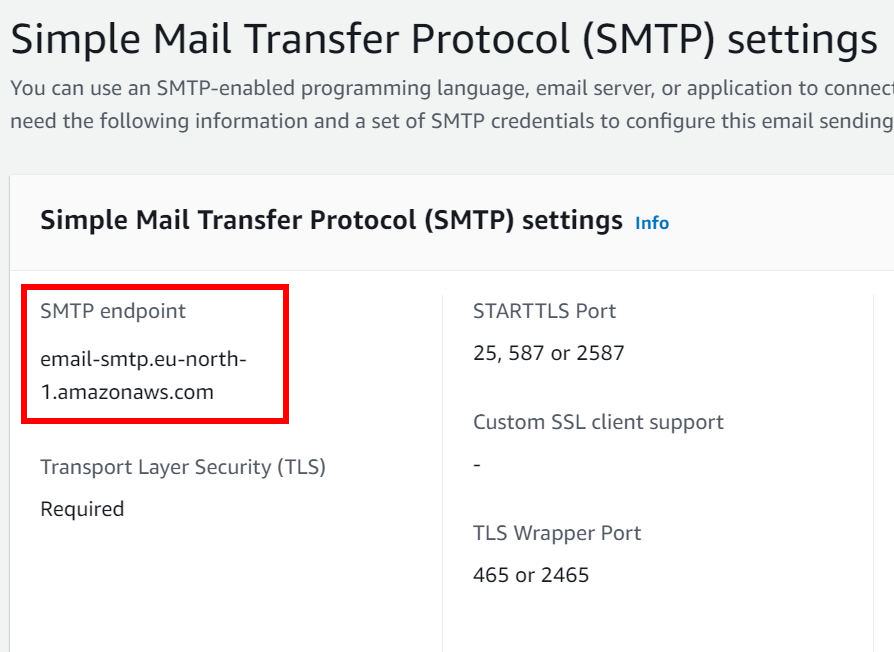
For SMTP Host, you can find it in the SMTP Settings screen in AWS (Amazon SES), as shown here. Please note: your endpoint might be different, depending on the Amazon Region you are using.
SMTP Username and Password
You can find the SMTP Username and password in the csv file you downloaded when you setup the Amazon SES credentials. You’ll need to grab those from there. But note that the csv file provides three columns, you need the last two columns: SMTP user name and SMTP password.
From Name
You should enter the name you want to appear as the sender of the email in the ‘From Name’ field. For example, you can put your business or blog name here. In fact, the default value is your website’s name.
From Email
As for the “From Email”, here you will need one of the verified email addresses you created for the Amazon SES service.
When you press next, you’re presented with features you may wish to have, or install. Only the first two are required, and you cannot remove.
The following two steps offer you to help improve WP Mail SMTP, and enter you license key (if you have one). Both steps are optional, and can be skipped.
Finally your settings are verified, then you’re provided with the option of installing more plugins, and sending a test email. I recommend you send a test email, just to make sure your setup is working.
Sending a test email using WP Mail SMTP
When sending a test email, you will need to send it to the other verified email account you setup with Amazon SES. Otherwise your test email will not be sent, because Amazon SES is still locked in the Sandbox state.
By using both verified identities as sender address and recipient address, you test email should go through and your test is successful. You can check you recipient email account to see the email as sent from WP Mail SMTP.
Monitoring and Managing Amazon SES Usage
Now you’re ready to start using WP Mail SMTP with Amazon SES. However, you can only send emails from one verified email address to another that you’ve set up with Amazon SES. You can apply this use case to a contact form on your website, which would send you an email when someone fills it out, or for receiving email notifications from your WordPress.
To enable unverified accounts to receive email through your Amazon SES setup, you need to request production access from your Amazon SES dashboard screen as shown here.
After you request production access, Amazon takes about 24 hours to grant you this access, upon their evaluation of your request.
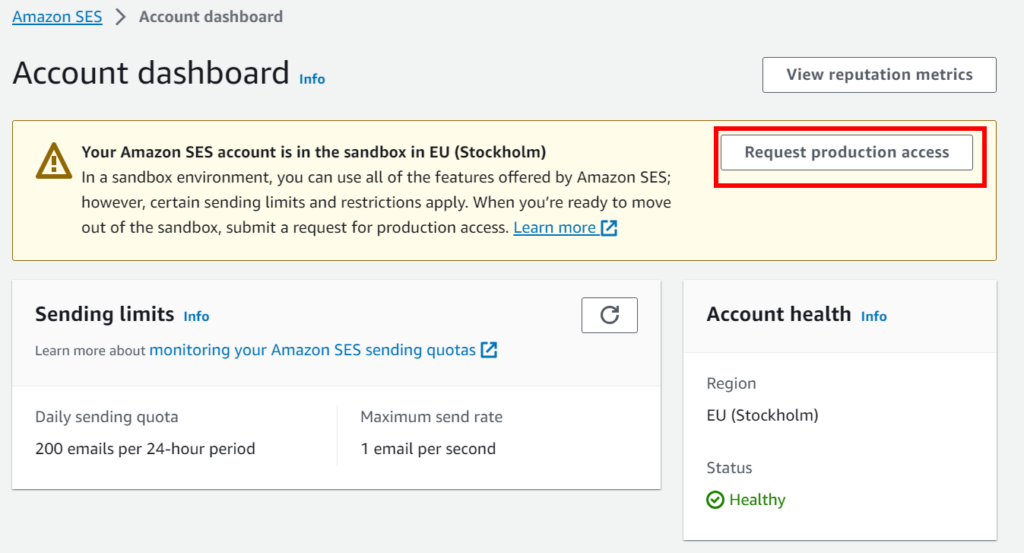
It is important throughout your use of Amazon SES to keep an eye on your account health, and sending statistics. Ensuring this is important to ensure compliance with Amazon’s terms and conditions and to prevent any misuse of your account. You must pay special attention to prevent your emails from getting rejected and to avoid any complaints of spam originating from your end.
Conclusion
If you followed this how to article, you will have now configured your WordPress installation to send emails using WP SMTP Mail and Amazon SES.
In the article we discussed how to setup your Amazon SES account correctly, and what needs to be done first. We then followed through by setting up WP SMTP Mail, the free version, to use your Amazon SES account. We also discussed how to transition your account to production use, and what you need to keep an eye on when you run in production.
I hope you found the steps clear and easy to follow. If you run into any issues, or if you have any questions, please don’t hesitate to add comments, or contact me. I would love to hear from you, and help you out.

Leave a Reply
You must be logged in to post a comment.