How to install multiple instances of WordPress on AWS Lightsail
Why Not WordPress Multisite
From my experience with WordPress on AWS Lightsail, I noticed that WordPress Multisite is not as flexible as using multiple instances of WordPress. The plugins you install for example are shared amongst all the sites in Multisite. Furthermore, some important plugins don’t work on Multisite, or require the premium version. For these reasons, I went through the exercise of installing multiple instance of WordPress on my server.
I wanted to go through the simple exercise of creating my own web server hosting multiple instances of WordPress on AWS Lightsail, not using the multisite feature though. Simple enough, this exercise shouldn’t typically take long to complete. Except of course for all the gotcha’s that one must be aware of!
To host my web server, I started by choosing an appropriate AWS Lightsail machine. These machines start at $3.5 per month. But note that after wasting time trying to work with the smallest of them (the $3.5 Nano machine) I found out that it cannot support MySQL. Basically, MySQL needs at least 1GB of RAM to start. So I opted for the $5 machine, which has 1GB RAM, 2 vCPUs, 40GB SSD, and 2TB of Transfer per month. I chose to have Ubuntu 22.04 LTS installed on it.
From this point on, in this article I will guide you through all the steps necessary to install WordPress on AWS Lightsail, and it’s underlying requirements (Apache, MySQL, PHP, etc.) and how to configure it to allow for multiple instances, without using the multisite feature, and finally how to secure your installation. I will go through these steps:
- Installing WordPress dependencies
- Installing WordPress
- Configuring Apache for WordPress
- Configure the databases for WordPress
- Secure Apache sites
- Configuring WordPress to connect to the database
1. Installing WordPress Dependencies
In my installation, I’m choosing to use Apache web server. Alternatively, I could use NGINX. But I’m more experienced with Apache. In addition to Apache, WordPress needs the PHP engine, MySQL database, and some additional PHP libraries and helpers.
But before installing anything, it’s good practice to make sure the server is updated and upgraded to the latest libraries. So we run the following commands:
$ sudo apt update
$ sudo apt upgrade
After updating and upgrading, I strongly recommend rebooting the machine. Then we can install all the dependency packages at once, or one at a time. The most demanding of the dependencies is MySQL, so I prefer to install it first, and make sure it installs properly, before installing the others.
$ sudo apt install mysql-serverThe above command installs the latest stable release of MySQL. This should be fine with WordPress. If the installation succeeds, the database service should start. You can verify your installation was successful by issue the following command:
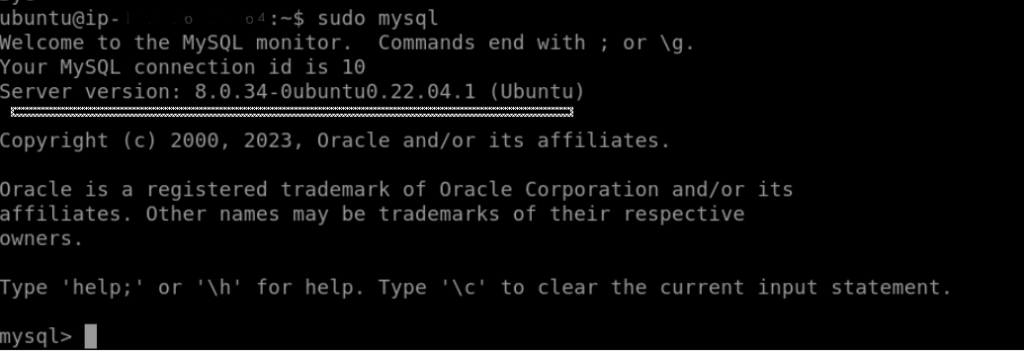
$ sudo mysqlThis will log you in to the server and display the version number of your MySQL Server, as shown below.

After installing MySQL server it is highly recommended to secure your installation, by running the following script:
$ sudo mysql_secure_installation1.1 Installing the remaining dependencies
After installing MySQL successfully, we can proceed to installing the servers and libraries. We can run the following command:
$ sudo apt install apache2 ghostscript \
  libapache2-mod-php php \
  php-bcmath php-curl php-imagick php-intl \
  php-json php-mbstring \
  php-mysql php-xml php-zip
If all the above installs successfully, as they should, we can proceed with installing WordPress. If there are any issues thus far, please don’t hesitate to comment below.
2. Installing WordPress on AWS Lightsail
Which folder to choose
The difference between using the `/var/www` folder and the `/srv/www` folder for installing WordPress on Apache in Ubuntu has to do with the Filesystem Hierarchy Standard (FHS) and best practices for organizing files in Linux systems. Both locations can be used for web content, but they serve different purposes and follow different conventions.
It is recommended to use the release from WordPress.org rather than using the APT package for installing WordPress. I will choose the /var/www folder to host the files of each of the instances of WordPress. First, I will create a demo1 site (and folder), then I will create a demo2 site (and folder).
We can issue the following commands to create the respective folders:
$ cd /var/www
$ sudo mkdir demo1
$ sudo mkdir demo2
We will get the latest WordPress package by issuing the following command from within the /var/www folder:
$ sudo wget https://wordpress.org/latest.tar.gzThis will place a file called latest.tar.gz within /var/www. This file contains the latest WordPress release, compressed and packaged in one file. To unpack this file we need to issue the following two commands (unpacking it to both demo1 and demo2):
$ sudo tar -xzf latest.tar.gz -C ./demo1
$ sudo tar -xzf latest.tar.gz -C ./demo2
Now within each of these two folders we should have a WordPress sub-folder, which contains the WordPress files and sub-folders.
After unpacking WordPress, we now need to assign the proper permission to the site folders demo1 and demo2, by issuing the following commands:
$ sudo chown www-data: /var/www/demo1 -R
$ sudo chown www-data: /var/www/demo2 -R
This will allow Apache to read and write to the respective folders containing the wordpress files and website content. Please note that this is not a suitable security configuration if there are more than one entity operating the websites (such as in a shared hosting environment). But for personal, and single entity operation this is sufficient.
3. Configuring Apache for WordPress
To configure the demo1 site on Apache, you need to follow the following steps.
Within the /etc/apache2/sites-available folder, use your preferred Ubuntu editor (vim or nano) to create a demo1.conf file which contains the following information:
<VirtualHost *:80>
    ServerName demo1.yourdomain.com
    DocumentRoot /var/www/demo1/wordpress
    <Directory /var/www/demo1/wordpress>
        Options FollowSymLinks
        AllowOverride Limit Options FileInfo
        DirectoryIndex index.php
        Require all granted
    </Directory>
    <Directory /var/www/demo1/wordpress/wp-content>
        Options FollowSymLinks
        Require all granted
    </Directory>
</VirtualHost>
As you may notice, this is assuming you own the domain name yourdomain.com, which you can use to add the DNS entries and server IP address for demo1 to. Further explanation of how this is accomplished is beyond the scope of this article. Reach out if you need help with your DNS settings. Contact me.
Repeat the same above for your demo2.conf file.
Now you’re ready to enable the demo1 and demo2 sites by running the commands:
$ sudo a2ensite demo1
$ sudo a2ensite demo2
You also need to enable URL rewriting mod with the following command:
$ sudo a2enmod rewriteFinally, you should restart the Apache service by issuing the following command:
$ sudo systemctl reload apache24. Configure the databases for WordPress
After configuring Apache, you still need to prepare MySQL to host the databases for the two sites, demo1 and demo2. To do that, you need to carry out the following:
- Create the database
- Create the user to access the database
You need to do the above twice, for demo1 site and for demo2 site.
You create the databases by doing the following:
$ sudo mysql -u root
mysql> CREATE DATABASE demo1;
mysql> CREATE DATABASE demo2;
And you create the users using these commands (please choose your own passwords!):
mysql> CREATE USER user1@localhost IDENTIFIED BY ‘password1’;
mysql> CREATE USER user2@localhost IDENTIFIED BY ‘password2’;
Now, you need to assign the users to the databases, using these commands:
mysql> GRANT SELECT,INSERT,UPDATE,DELETE,CREATE,DROP,ALTER
-> ON demo1.*
-> TO user1@localhost;

mysql> GRANT SELECT,INSERT,UPDATE,DELETE,CREATE,DROP,ALTER
-> ON demo2.*
-> TO user2@localhost;
Then you need to apply these new privileges to the server by issuing the following command
mysql> FLUSH PRIVILEGES;

mysql> quit
And finally, you need to restart the MySQL service as follows:
$ sudo systemctl restart mysql5. Secure Apache sites
Before attempting to connect to the demo1 and demo2 sites, I strongly recommend that you install Let’s Encrypt certificates for HTTPS connectivity. To do that, we must first install the Certbot client as follows:
$ sudo apt install certbot python3-certbot-apacheTo verify the installation we can issue the following command:
$ certbot --versionTo get the certificates for the domains, we issue the following command:
$ sudo certbot --apacheYou will be asked to provide your valid email address and accept the term of service. And you’ll be asked if you want to share your email with the Electronic Frontier Foundation to receive news and other information. This is optional, and the choice is yours whether you wish to subscribe or not.
Finally, you will be asked to select the domain on which you want to install the Let’s Encrypt SSL, in this case you would want to select both domains, demo1 and demo2, by leaving your input blank.
6. Configure WordPress to connect to the database
We’re finally at the stage where we will start to see some results! After setting up your DNS to point to your server’s IP address, you can use your browser to navigate to https://demo1.yourdomain.com. From there you will need to plugin the information you know (from the steps above) basically to tell WordPress how to connect to your database.
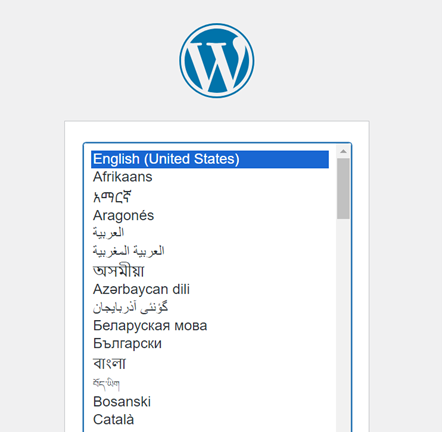
You’ll start here:

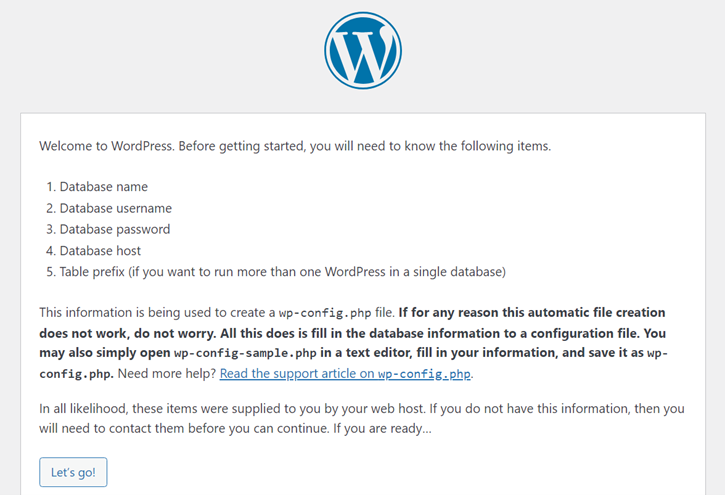
After you select your preferred language and press continue, it will let you know what information is required from you:

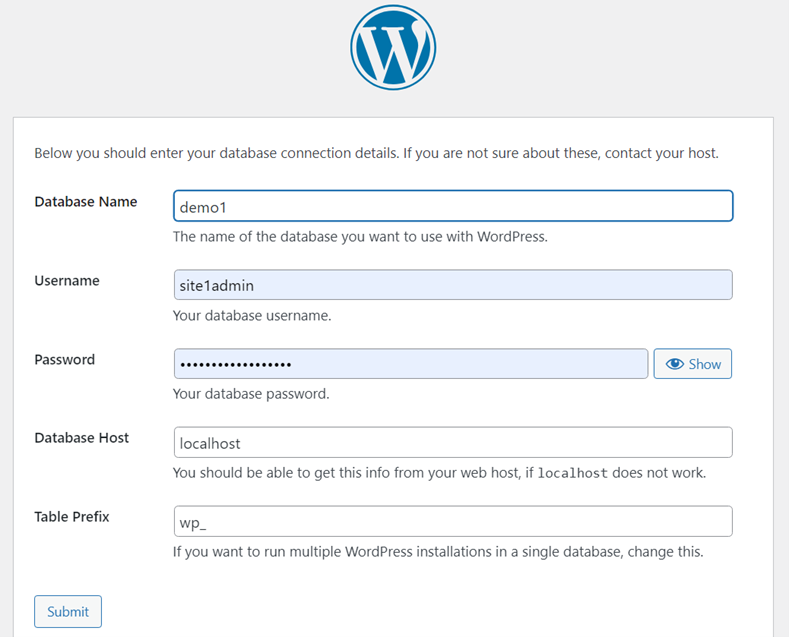
And you need to fill out this information based on how you created your database in step 4 above. For example:

Once you enter the correct information, WordPress will validate connectivity to the database and then prompt you to install. This is the point where WordPress will build your database.
With the completion of this step, you would have completed, installation of WordPress on site demo1. You can repeat this step (no. 6) for you demo2 site, and any other instances of WordPress on your server. Each of these instances is completely independent of the others. You can install different plugins, add different content, and certainly have different admins for each site. I use this primarily as I build web sites for client, for testing and demonstrating work progress before going live. Once ready to go live, I like to rebuild the WordPress installation on a separate AWS Lightsail machine, dedicated for the client. And using a good backup and restore or migration plugin, I move over the content and artifacts of the developed site to their instance. But their instance would typically be security hardened, and separate from my development server.
I hope this step-by-step article has provided some assistance to you. If you have any questions, or comments, please don’t hesitate to comment below. I will do my best to respond to your comments as soon as possible.

Leave a Reply
You must be logged in to post a comment.